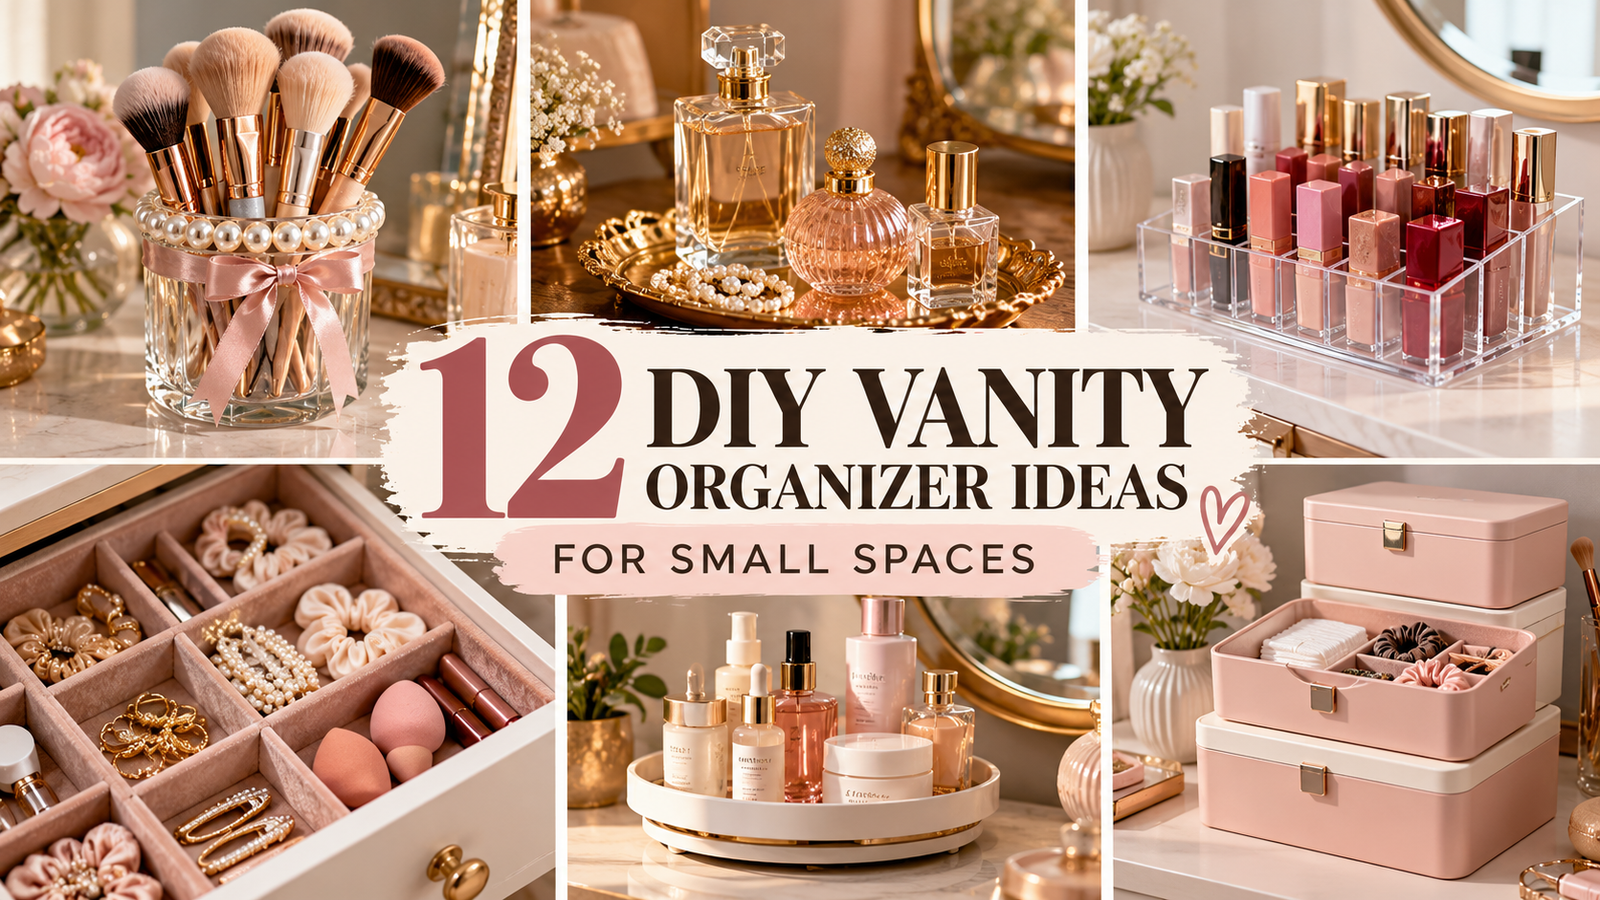
A beautiful makeup vanity doesn’t need a huge dressing room, expensive furniture, or dozens of storage drawers. Sometimes, all you need is a little creativity to transform a cluttered corner into an organized, aesthetic beauty space.
If your makeup brushes are scattered across your desk, lipsticks are hiding in drawers, and skincare bottles are taking over every available surface, you’re not alone.
The good news? You can create beautiful storage solutions using affordable materials, repurposed containers, and simple DIY techniques.
These DIY vanity organizer ideas are perfect for small bedrooms, apartment bathrooms, dorm rooms, and compact dressing tables.
From pearl-trimmed makeup brush holders and elegant perfume trays to hidden drawer organizers and wall-mounted beauty shelves, these projects combine practical storage with a luxurious aesthetic.
Whether you love soft pink decor, minimalist neutrals, vintage-inspired beauty corners, or modern acrylic organizers, there’s something here for your space.
Let’s explore 12 creative ways to make your vanity look organized, beautiful, and surprisingly expensive.
1. Pearl-Trimmed Makeup Brush Holder
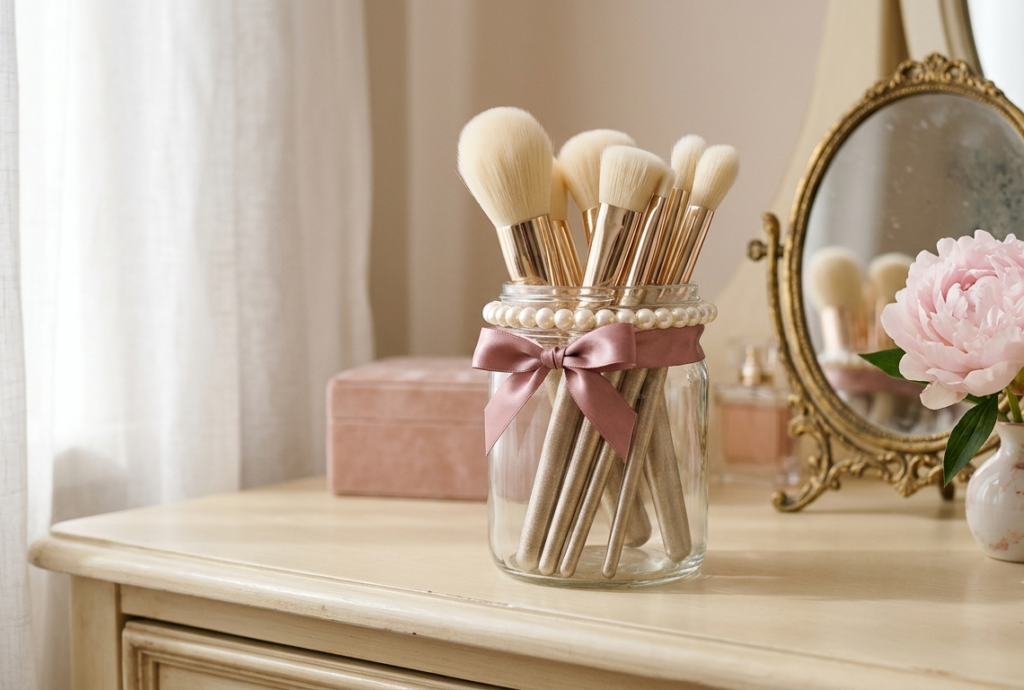
A pearl-trimmed makeup brush holder is one of the easiest ways to add a feminine, luxurious touch to a small vanity.
Instead of purchasing an expensive decorative organizer, transform a plain glass jar into a beautiful brush holder using adhesive pearl trim.
The finished piece looks elegant, takes up very little space, and keeps your everyday makeup brushes within reach.
Materials you’ll need:
- A clean glass jar or small cylindrical container
- Adhesive faux-pearl trim
- Optional satin ribbon
- Scissors
- A small amount of craft glue, if needed
How to make it:
- Wash and dry your glass jar completely.
- Measure the circumference of the jar.
- Cut enough pearl trim to wrap around the upper edge.
- Attach the trim carefully, keeping the pearls aligned.
- Add a small satin bow if you prefer a romantic aesthetic.
- Allow any adhesive to cure according to its instructions before adding brushes.
Why you’ll love it: It looks boutique-made but requires very little crafting experience.
Best for: Small vanities, feminine bedroom decor, and makeup brush storage.
Estimated DIY cost: $5–$12, depending on the materials you already own.
Styling tip: Choose ivory pearls and a clear glass jar for a timeless, elegant appearance.
2. Vintage Gold Perfume Tray
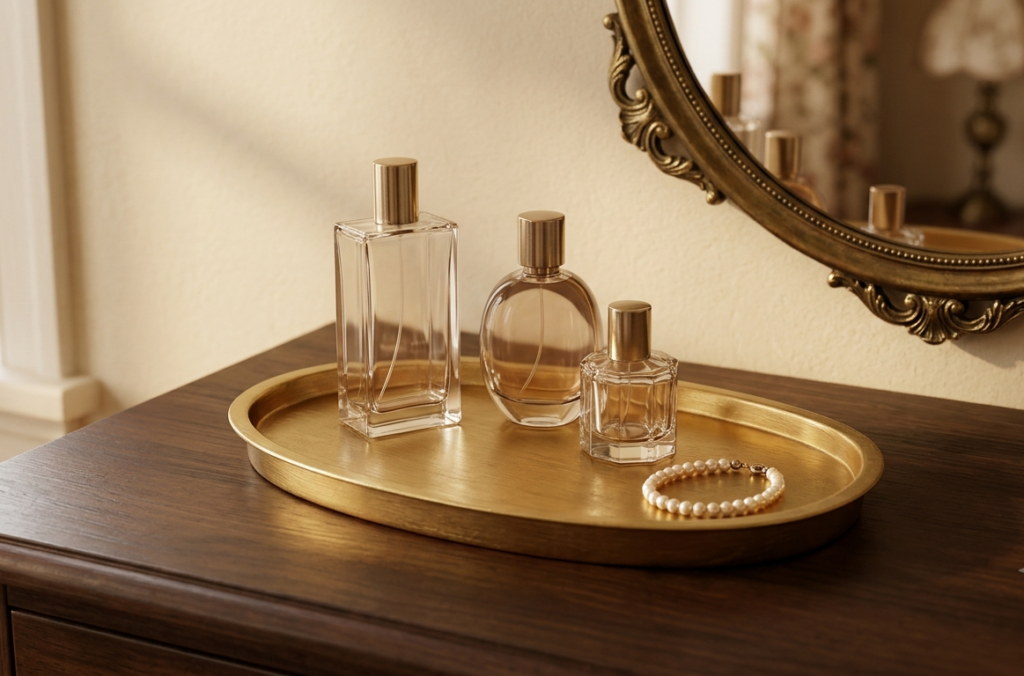
A beautiful perfume display can instantly make your vanity look more sophisticated.
A vintage-inspired gold tray creates a designated space for perfume bottles, body mists, and a few favorite accessories.
Instead of leaving products scattered across your vanity, arrange them on one compact decorative surface.
This creates visual organization while making your beauty collection feel intentional.
Materials you’ll need:
- A small thrifted tray or shallow decorative dish
- Metallic gold craft paint suitable for the tray material
- Paintbrush
- Optional felt pads
How to make it:
- Clean the tray and let it dry.
- Lightly prepare the surface according to the paint manufacturer’s directions.
- Apply thin coats of metallic gold paint.
- Allow the finish to dry and cure fully.
- Attach felt pads underneath if the tray could scratch your vanity.
- Arrange your favorite perfume bottles and accessories.
Why you’ll love it: A simple tray makes everyday beauty products look like a curated collection.
Best for: Perfume storage, old-money-inspired decor, and small dressing tables.
Estimated DIY cost: $5–$18.
Styling tip: Limit the display to three or four beautiful bottles to prevent overcrowding.
3. Clear Acrylic Lipstick Organizer
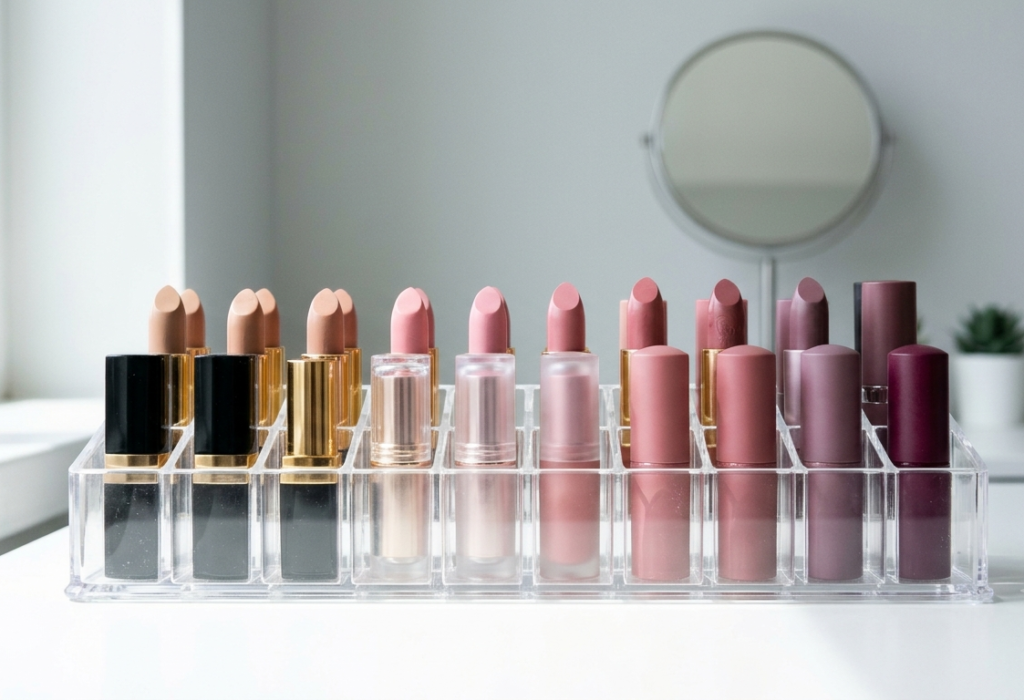
A clear acrylic lipstick organizer is perfect for anyone who loves makeup but struggles to find their favorite shades.
The transparent design makes your collection easy to see while maintaining a clean, modern aesthetic.
You can create a simple divided holder by adding compartments to a small clear acrylic container.
Unlike bulky lipstick towers, a compact rectangular organizer fits neatly into narrow vanity spaces.
Materials you’ll need:
- A small clear acrylic box
- Thin acrylic dividers or a ready-made clear compartment insert
- Acrylic-compatible adhesive, if required
- Ruler
- Soft cleaning cloth
How to make it:
- Measure the inside of your acrylic container.
- Select dividers that fit securely inside.
- Arrange the dividers to create individual lipstick compartments.
- If adhesive is needed, use one recommended for the acrylic material and follow the safety directions.
- Let the organizer cure completely.
- Place lipsticks upright in the finished compartments.
Why you’ll love it: You can see every shade without digging through a makeup bag.
Best for: Lipstick collections, minimalist vanities, and narrow countertops.
Estimated DIY cost: $8–$20.
Styling tip: Arrange lipsticks by color, from nude and pink to berry and red, for a beautiful gradient display.
4. Velvet-Lined Jewelry and Makeup Drawer Organizer
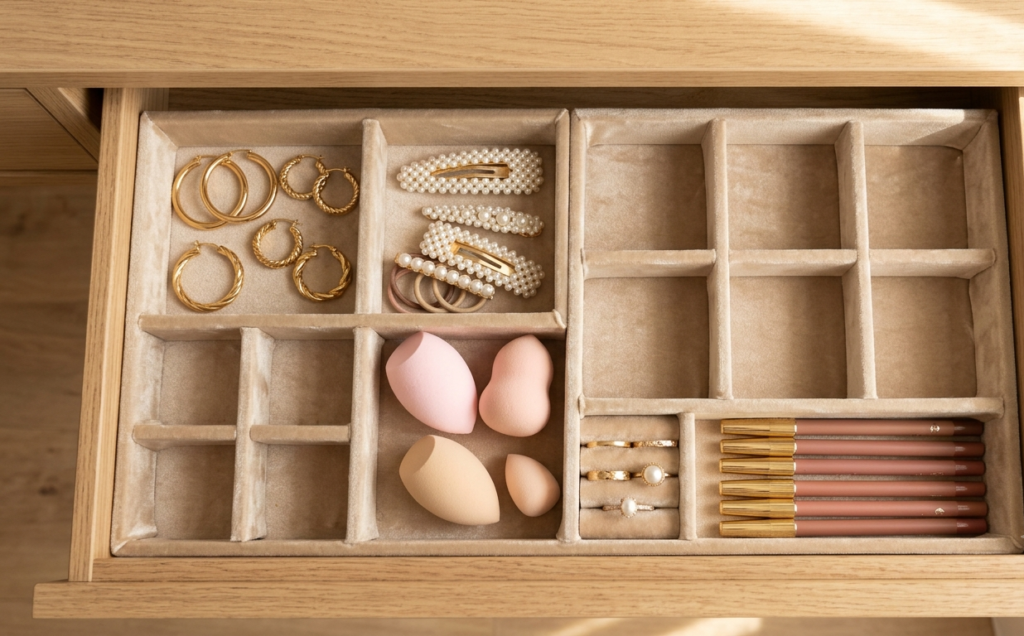
Small vanity drawers often become messy because everything moves around whenever you open them.
A velvet-lined drawer organizer solves this problem while adding a soft, luxurious finish.
Use small cardboard boxes or shallow trays to create compartments for jewelry, hair clips, makeup sponges, and other accessories.
Covering the compartments with velvet-look adhesive fabric makes the entire drawer feel custom-designed.
Materials you’ll need:
- Small sturdy cardboard boxes or shallow trays
- Velvet-look adhesive fabric
- Scissors
- Ruler
- Optional removable drawer liner
How to make it:
- Empty your vanity drawer and measure its interior.
- Arrange small boxes to fit the available space.
- Trim the boxes if necessary, keeping the edges neat.
- Cover each box with velvet-look adhesive fabric.
- Place the finished compartments inside the drawer.
- Organize jewelry, hair accessories, and makeup into separate sections.
Why you’ll love it: It turns a cluttered drawer into an organized, boutique-style storage space.
Best for: Small drawers, jewelry storage, and hidden vanity organization.
Estimated DIY cost: $5–$15.
Styling tip: Choose champagne beige, dusty rose, or soft taupe velvet for an elegant finish.
5. Floating Mini Makeup Shelf
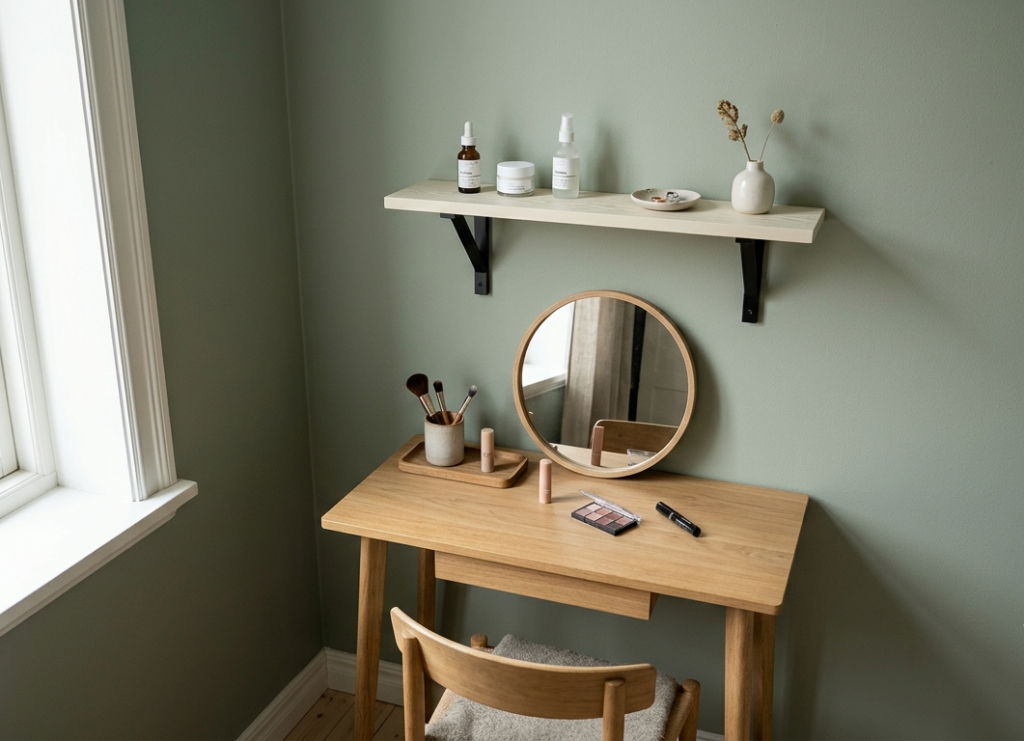
When your vanity surface is small, the wall above it can become valuable storage space.
A floating mini shelf allows you to display a few everyday skincare products, perfume bottles, or decorative accessories without taking up countertop space.
Choose a slim shelf with a shallow depth so it doesn’t overwhelm your beauty corner.
Materials you’ll need:
- A small floating shelf
- Appropriate wall anchors and screws
- Level
- Drill or installation tools recommended by the manufacturer
- Optional decorative shelf liner
How to make it:
- Measure the wall space above your vanity.
- Choose a shelf that fits without blocking your mirror.
- Locate a suitable mounting position.
- Install the shelf using hardware appropriate for your wall type.
- Check that the shelf is level and securely attached.
- Arrange lightweight beauty products within the shelf’s weight limit.
Why you’ll love it: It creates extra storage without sacrificing your limited vanity surface.
Best for: Apartment bedrooms, small vanities, and compact makeup corners.
Estimated DIY cost: $12–$30.
Styling tip: Choose a cream or natural-wood shelf and display only your prettiest everyday essentials.
Safety note: Don’t place heavy glass bottles on an inadequately secured shelf. Renters should check lease rules before drilling.
6. Rotating Skincare Organizer
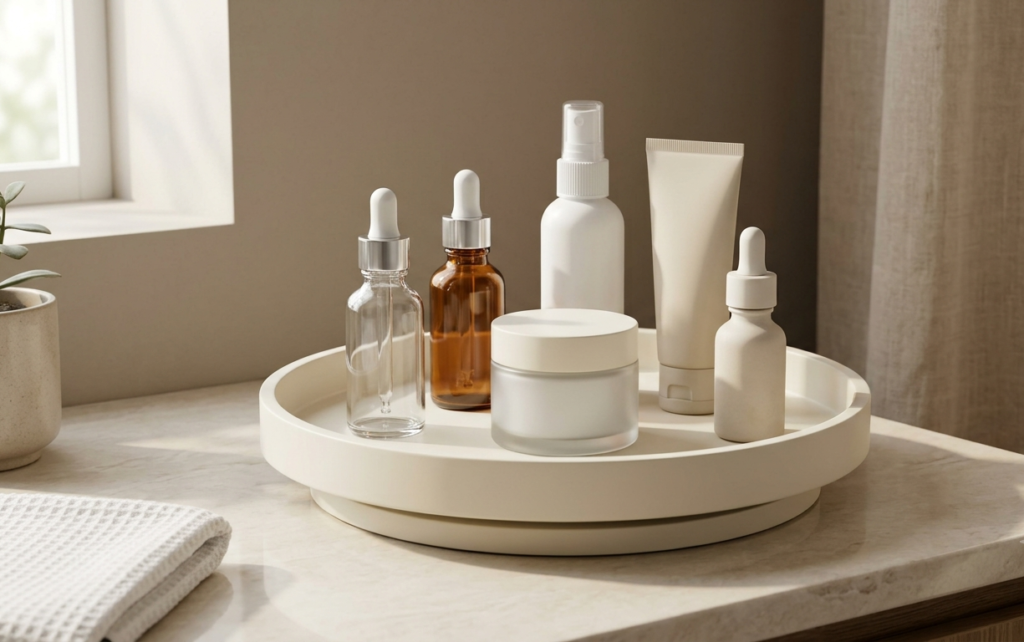
A rotating skincare organizer makes it easier to access products without moving everything around.
Instead of buying a large beauty storage tower, create a compact rotating station using a small lazy Susan tray.
This works especially well for moisturizers, serums, facial mists, and other frequently used products.
Materials you’ll need:
- A small rotating lazy Susan tray
- A shallow decorative container or tray that fits on top
- Non-slip liner or pads
- Optional decorative trim
How to make it:
- Select a rotating base that fits your vanity.
- Measure the top surface.
- Add a shallow tray or container that fits securely.
- Place non-slip material between the surfaces if needed.
- Test the rotation before adding products.
- Arrange your skincare bottles from shortest to tallest.
Why you’ll love it: You can reach products at the back without creating a mess.
Best for: Skincare lovers, compact vanities, and everyday beauty routines.
Estimated DIY cost: $8–$22.
Styling tip: Use a clear or ivory tray to keep the display looking light and uncluttered.
7. Ribbon-Wrapped Hair Accessory Organizer
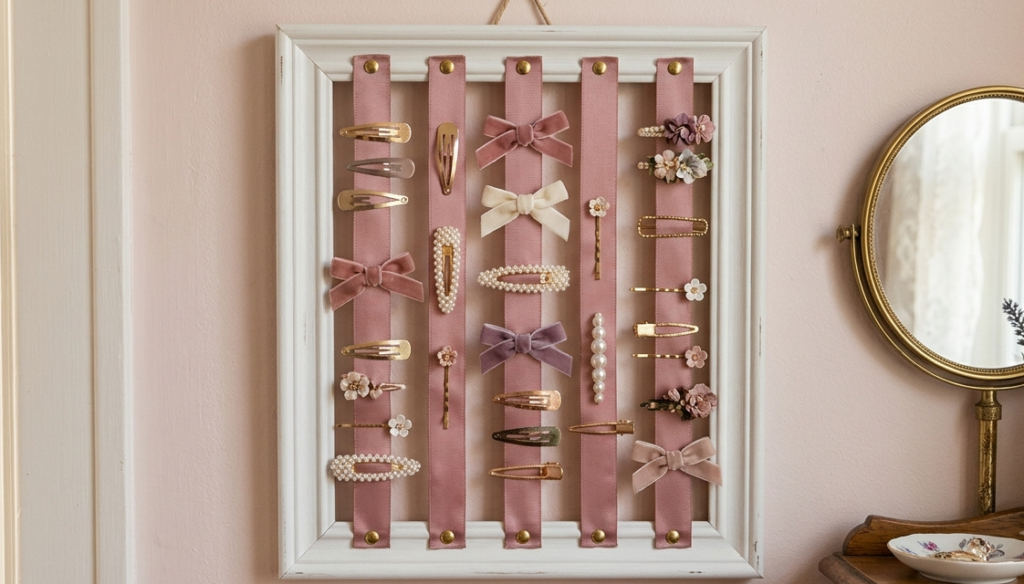
Hair bows, scrunchies, clips, and ribbons can quickly create clutter on a small vanity.
A ribbon-wrapped organizer keeps your accessories visible while doubling as cute bedroom decor.
You can make one using a small wooden frame and several strips of satin ribbon.
Hair clips attach directly to the ribbons, while lightweight bows can be secured with small loops.
Materials you’ll need:
- A small wooden picture frame
- Satin or grosgrain ribbon
- Staple gun or strong craft adhesive suitable for the frame
- Scissors
- Optional decorative hooks
How to make it:
- Remove the glass and backing from the picture frame.
- Cut several ribbon strips to fit vertically across the frame.
- Secure each ribbon to the back of the frame.
- Keep the ribbons evenly spaced.
- Reattach the backing if appropriate for your design.
- Clip your hair accessories onto the ribbons.
Why you’ll love it: It transforms messy accessories into a beautiful decorative display.
Best for: Hair bows, barrettes, clips, and small bedrooms.
Estimated DIY cost: $5–$15.
Styling tip: Choose blush pink ribbons with a white frame for a soft feminine aesthetic.
8. Marble-Effect Makeup Brush and Tool Tray
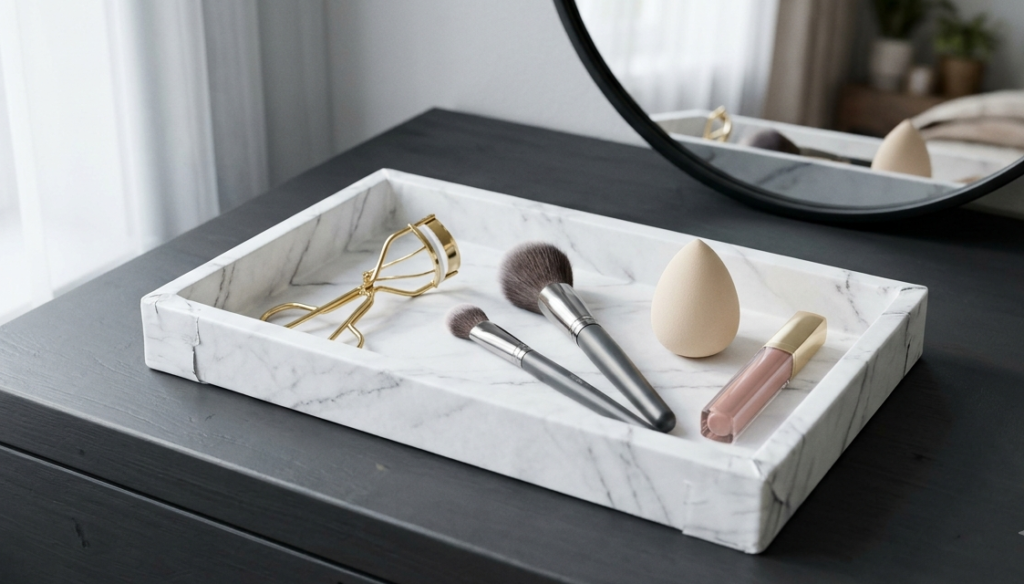
A marble-effect organizer is perfect for anyone who loves clean, modern luxury.
Instead of purchasing an expensive stone tray, use marble-pattern adhesive vinyl to transform a simple rectangular organizer.
The result is a sleek surface for makeup brushes, eyelash curlers, beauty sponges, and everyday essentials.
Materials you’ll need:
- A small rectangular tray
- Marble-pattern adhesive vinyl
- Craft knife or scissors
- Ruler
- Soft cloth
How to make it:
- Clean and dry your tray.
- Measure the tray’s interior surface.
- Cut the marble vinyl slightly larger than needed.
- Apply the vinyl slowly, smoothing out air bubbles.
- Trim the excess around the edges.
- Arrange your makeup tools neatly.
Why you’ll love it: It creates a polished marble appearance without the weight or cost of real stone.
Best for: Modern vanities, minimalist decor, and affordable luxury-inspired storage.
Estimated DIY cost: $5–$12.
Styling tip: White marble with subtle gray veining pairs beautifully with gold makeup accessories.
9. Hidden Magnetic Bobby Pin Organizer
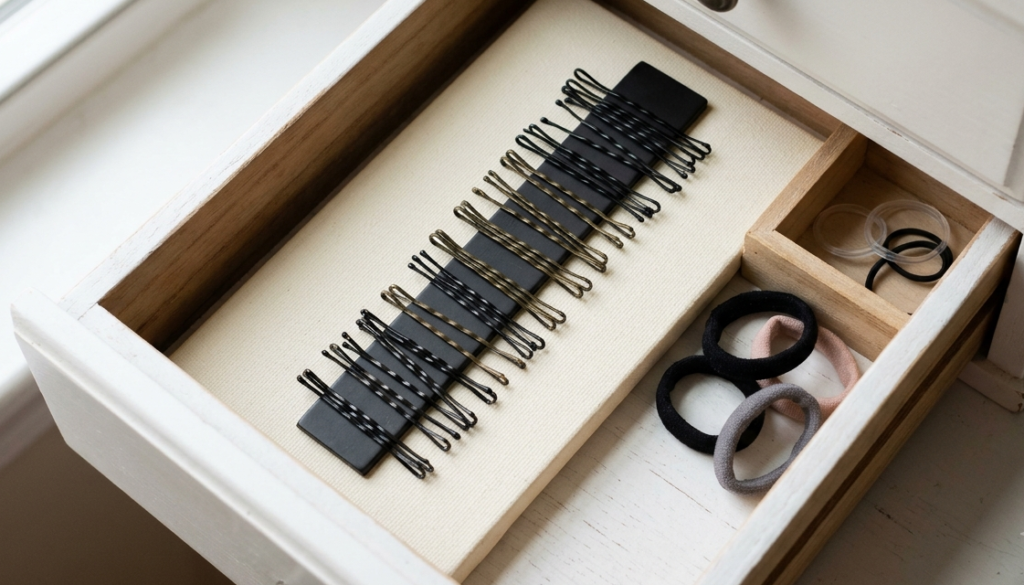
Bobby pins are small, easy to lose, and often end up scattered across drawers and countertops.
A magnetic organizer provides a simple way to keep them together.
Use a magnetic strip inside a shallow drawer or on a removable storage board.
The strip holds compatible metal bobby pins in one place so they’re easy to find.
Materials you’ll need:
- A small magnetic strip
- A shallow storage tray or removable board
- Suitable adhesive
- Optional decorative paper
How to make it:
- Choose a small tray or board that fits your vanity drawer.
- Clean and dry the surface.
- Attach the magnetic strip securely.
- Allow the adhesive to cure.
- Place your metal bobby pins on the strip.
- Keep the organizer inside a drawer or another accessible location.
Why you’ll love it: It’s compact, inexpensive, and surprisingly practical.
Best for: Bobby pins, metal hair clips, and small vanity drawers.
Estimated DIY cost: $3–$10.
Styling tip: Hide the organizer inside a drawer to maintain a clean vanity surface.
10. Stackable Pastel Makeup Storage Boxes
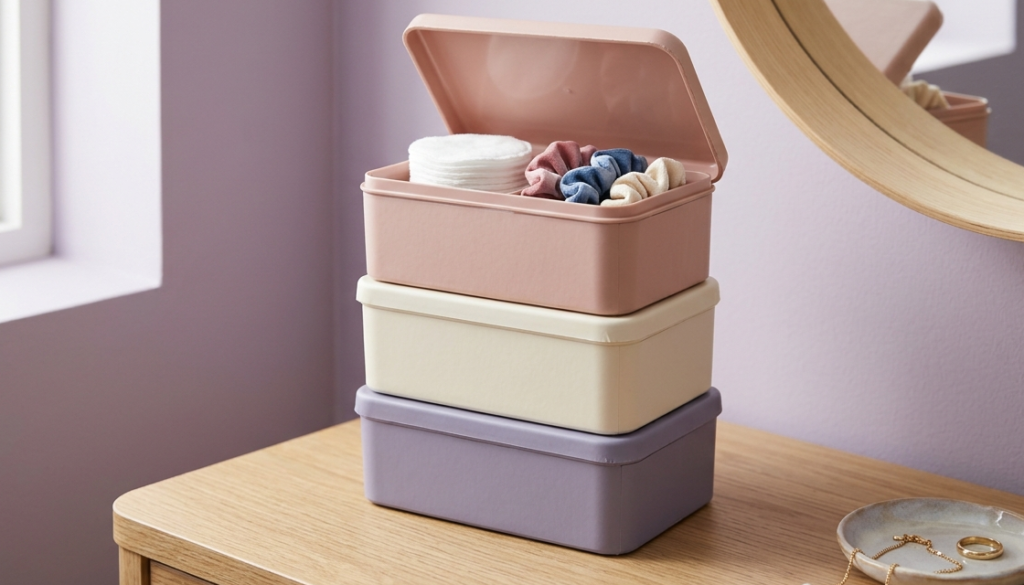
Stackable makeup boxes are ideal when you need more storage but have limited horizontal space.
You can create a coordinated set using small lightweight storage containers in matching pastel shades.
The boxes can hold makeup sponges, cotton rounds, hair ties, nail accessories, and backup beauty products.
Materials you’ll need:
- Two or three stackable storage containers
- Pastel adhesive vinyl or suitable paint
- Labels
- Scissors
- Optional non-slip pads
How to make it:
- Select containers designed to stack securely.
- Clean the surfaces.
- Decorate the exterior using pastel vinyl or compatible paint.
- Allow everything to dry or cure.
- Add small labels to identify the contents.
- Stack the containers according to the manufacturer’s instructions.
Why you’ll love it: Vertical storage creates extra organization without taking up more counter space.
Best for: Small bedrooms, dorm rooms, and limited vanity surfaces.
Estimated DIY cost: $8–$25.
Styling tip: Use muted blush, cream, and dusty lavender rather than bright neon colors.
11. Vintage Teacup Beauty Organizer
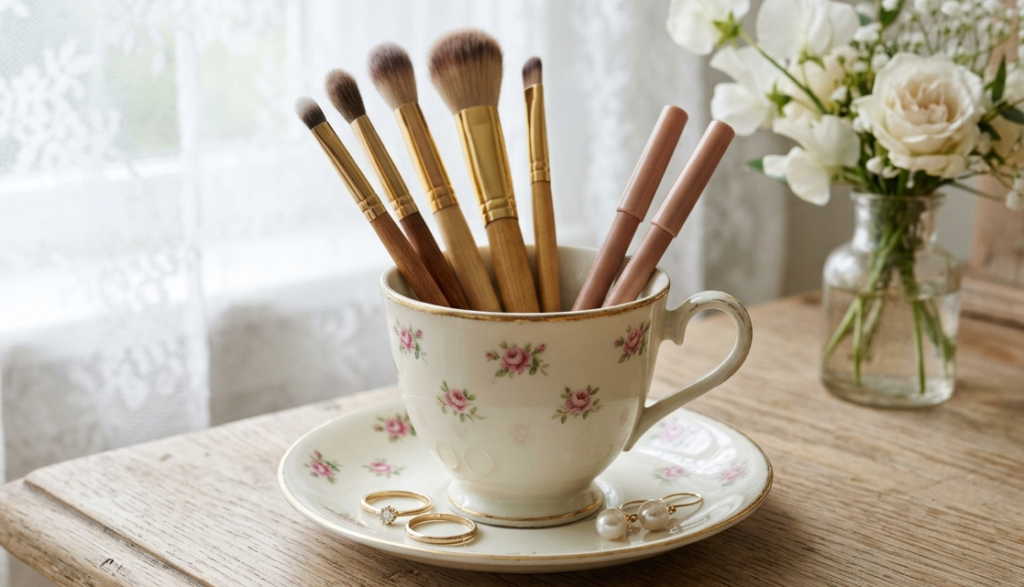
A vintage teacup organizer is a charming way to repurpose beautiful dishes into functional vanity decor.
A decorative teacup can hold makeup brushes, lip liners, hairpins, or small beauty accessories.
Choose a cup with a wide, stable base to prevent tipping.
For extra organization, pair it with a matching saucer to hold rings or small earrings.
Materials you’ll need:
- A clean vintage-style teacup
- Matching saucer, if available
- Optional non-slip pads
- Soft cleaning cloth
How to make it:
- Choose a sturdy teacup with no cracks or sharp edges.
- Wash and dry it thoroughly.
- Place the cup on a stable saucer.
- Add non-slip pads underneath if necessary.
- Fill the cup with lightweight beauty tools.
- Use the saucer for rings, earrings, or small clips.
Why you’ll love it: It adds romantic vintage character without requiring complicated crafting.
Best for: Cottagecore vanities, vintage-inspired decor, and small makeup collections.
Estimated DIY cost: $3–$12.
Styling tip: Choose a cream teacup with delicate pink floral details and a thin gold rim.
12. Fold-Out Mini Vanity Organizer
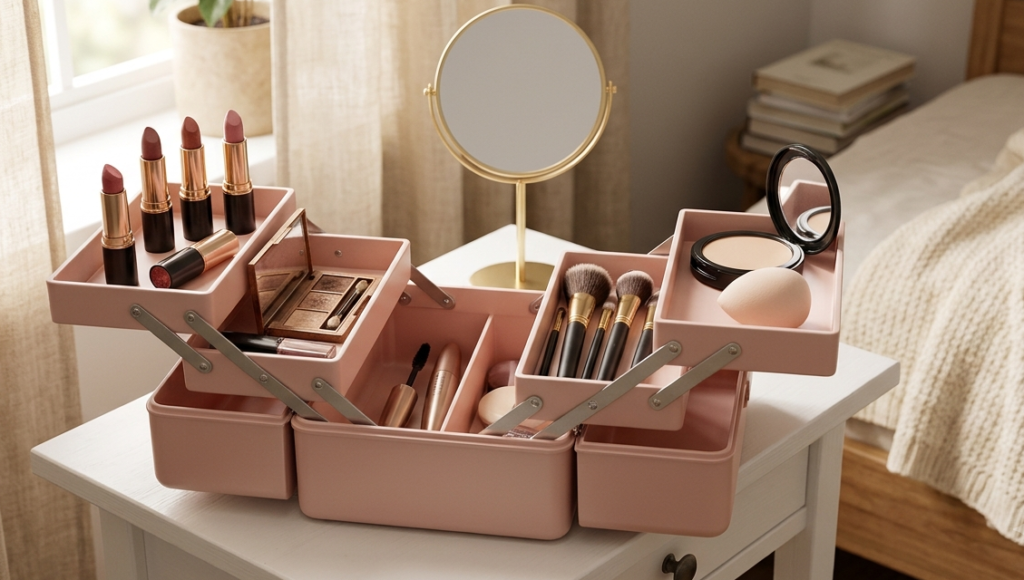
A fold-out organizer is one of the most useful DIY vanity storage ideas for truly small spaces.
Instead of keeping makeup spread across your desk, create a portable beauty station using a compact folding craft case with adjustable compartments.
When you’re finished getting ready, simply close the organizer and store it in a drawer, cabinet, or closet.
Materials you’ll need:
- A compact folding craft organizer or portable compartment case
- Removable dividers
- Soft drawer liner
- Small labels
- Optional decorative adhesive vinyl
How to make it:
- Choose a folding case large enough for your daily makeup essentials.
- Adjust the internal compartments to fit your products.
- Add a soft liner to protect fragile items.
- Organize products by category.
- Label compartments if desired.
- Decorate the exterior with neutral or pastel vinyl.
- Close and store the organizer when not in use.
Why you’ll love it: It allows you to create a functional makeup station without needing a permanent vanity.
Best for: Dorm rooms, studio apartments, shared bedrooms, and portable makeup storage.
Estimated DIY cost: $12–$30.
Styling tip: Choose a cream or blush-pink case with a simple design for a polished appearance.
Which DIY Vanity Organizer Is Best for Your Space?
Not every organizer works equally well in every room.
Use this comparison to choose a project based on your storage needs.
| DIY Organizer | Best For | Estimated Cost |
|---|---|---|
| Pearl-Trimmed Brush Holder | Makeup brushes | $5–$12 |
| Vintage Gold Perfume Tray | Perfume display | $5–$18 |
| Clear Acrylic Lipstick Organizer | Lipsticks | $8–$20 |
| Velvet-Lined Drawer Organizer | Hidden storage | $5–$15 |
| Floating Mini Shelf | Vertical storage | $12–$30 |
| Rotating Skincare Organizer | Skincare bottles | $8–$22 |
| Ribbon Hair Accessory Organizer | Clips and bows | $5–$15 |
| Marble-Effect Tool Tray | Everyday makeup tools | $5–$12 |
| Magnetic Bobby Pin Organizer | Small hair accessories | $3–$10 |
| Stackable Pastel Boxes | Backup beauty products | $8–$25 |
| Vintage Teacup Organizer | Small beauty tools | $3–$12 |
| Fold-Out Mini Organizer | Portable makeup storage | $12–$30 |
Costs are approximate US material budgets, not verified current retail prices. Repurposing supplies you already own may cost less.
7 Small Vanity Organization Tips That Make a Big Difference
1. Keep Only Everyday Products on Display
One of the easiest ways to make a small vanity look organized is to reduce the number of visible products.
Display your favorite perfume, daily moisturizer, makeup brushes, and a few frequently used essentials.
Store occasional-use products in drawers or boxes.
2. Use Vertical Space
When your vanity surface is limited, shelves, stackable containers, and wall organizers can create additional storage.
Choose lightweight, secure solutions that fit the space without overcrowding it.
3. Group Similar Products Together
Keep lipsticks with lipsticks, brushes with brushes, and hair accessories in their own compartments.
This makes your routine easier and reduces the time spent searching for products.
4. Choose a Consistent Color Palette
A coordinated palette can make even inexpensive organizers look beautiful.
Some combinations to try include:
- Ivory, champagne, and gold
- Blush pink, cream, and pearl white
- Beige, taupe, and warm wood
- Dusty lavender, soft pink, and white
- Clear acrylic, silver, and cool gray
5. Make Use of Drawer Dividers
Drawer dividers are especially useful for small items such as hairpins, lip liners, cotton rounds, and jewelry.
They prevent products from shifting around and becoming tangled.
6. Leave Some Empty Space
A luxurious vanity doesn’t need to be completely filled.
Leaving visible space around your organizers creates a cleaner, more intentional appearance.
7. Choose Storage That Fits Your Routine
The prettiest organizer isn’t always the most practical.
If you use your makeup every morning, prioritize easy access.
If your vanity doubles as a desk, choose organizers that can be moved or stored away quickly.
How to Make a Small Vanity Look Expensive on a Budget
A beautiful vanity is more about thoughtful styling than expensive products.
Start by selecting two or three organizers that work well together.
For example, combine a pearl-trimmed brush holder, a small gold perfume tray, and a velvet-lined drawer organizer.
This creates a coordinated look without filling every inch of your vanity.
Next, focus on materials and finishes.
Clear glass, soft velvet, faux marble, metallic accents, and satin ribbons can create an elegant appearance when used sparingly.
Avoid mixing too many decorative styles in one small area.
Finally, keep the surface clean and maintain your organizers regularly.
Dust perfume bottles, wash reusable brush holders, and remove empty beauty packaging.
A neat, well-maintained vanity often looks more luxurious than an expensive but overcrowded setup.
Common DIY Vanity Organizer Mistakes to Avoid
Choosing containers that are too large: Oversized organizers can make a small vanity feel cramped. Measure your available space before buying materials.
Using too many decorations: Pearls, ribbons, glitter, and metallic details can look beautiful, but using all of them together may create visual clutter.
Ignoring product weight: Heavy perfume bottles and glass containers require stable trays and properly secured shelves.
Using unsuitable adhesives: Select adhesives compatible with your materials, follow ventilation instructions, and allow them to cure before placing products inside.
Storing products near heat or direct sunlight: Some cosmetics and fragrances can deteriorate when exposed to excessive heat or sunlight. Follow their storage instructions.
Forgetting about cleaning: Choose organizer surfaces that are easy to wipe down, especially for frequently used makeup tools.
Frequently Asked Questions
How do I organize a small makeup vanity?
Start by sorting your products into categories such as makeup, skincare, hair accessories, and perfume.
Keep daily essentials within reach and store less frequently used products in drawers, stackable containers, or portable organizers.
What is the cheapest DIY vanity organizer?
A repurposed glass jar, vintage teacup, or magnetic bobby pin holder can be inexpensive, especially if you already have the materials.
How can I make my vanity look aesthetic?
Choose a consistent color palette, use coordinated storage containers, display a few favorite products, and leave some empty space.
Soft lighting and clean surfaces can also make a big difference.
What can I use instead of a makeup organizer?
Glass jars, shallow trays, small cardboard boxes, teacups, drawer dividers, and compact craft organizers can all be repurposed for beauty storage.
How do I organize makeup without drawers?
Try a rotating skincare tray, compact acrylic organizer, floating shelf, or portable folding case.
These options provide accessible storage without requiring built-in drawers.
How can I organize a vanity in a small bedroom?
Choose slim storage solutions, use vertical wall space where appropriate, and avoid keeping unnecessary products on the surface.
A portable organizer can also be helpful if your vanity doubles as a desk.
Are DIY vanity organizers worth making?
They can be a good option if you enjoy crafting, want to reuse materials, or need a customized size.
However, compare the cost of materials with ready-made organizers before starting a complicated project.
How can I organize makeup brushes hygienically?
Store clean, fully dry brushes in a clean holder, preferably with the bristles facing upward.
Wash brushes regularly using a suitable cleanser and allow them to dry completely before putting them away.
Final Thoughts
These 12 DIY vanity organizer ideas for small spaces prove that you don’t need a large dressing room or expensive furniture to create a beautiful beauty corner.
From elegant Pearl-Trimmed Makeup Brush Holders and Vintage Gold Perfume Trays to practical Velvet-Lined Drawer Organizers and Fold-Out Mini Vanity Storage, every project offers a different way to make your space more functional.
If you love romantic, feminine decor, try the Pearl-Trimmed Brush Holder or Vintage Teacup Organizer.
For a modern minimalist vanity, choose the Clear Acrylic Lipstick Organizer or Marble-Effect Tool Tray.
And if storage space is your biggest challenge, the Floating Mini Shelf, Stackable Pastel Boxes, and Fold-Out Mini Organizer are especially practical choices.
The secret to a beautiful vanity is combining organization with a style that feels personal to you.
Choose your favorite DIY project, gather a few affordable materials, and transform your small beauty space into something beautiful!